How Long Does It Take To Process A Meat Chicken?
Congratulations! Raising and processing your own chickens is a huge leap towards great nutrition and self sufficiency!
At first, processing your own meat birds can be confusing. How long does it take to get the bird ready to go into your freezer?
Processing a broiler takes 5.5 minutes if plucking by hand and 4 minutes each if using a plucker. With practice and an efficient set up, times can be reduced to 4 minutes (hand plucking) and less than 3 minutes (using a plucker).
Is Raising Your Own Meat Chickens Worth It? will walk you through the costs and considerations of raising broilers.
Processing a broiler takes 5.5 minutes each
- 1 minute bleeding out in the killing cone
- 30 seconds scalding
- 3 minutes each to pluck by hand
- 2 minutes to eviscerate
- 15 second rinse in cold water
We just processed a few chickens yesterday, so these are our times. We were not overly fast, this is more of a comfortable pace.
Folks who process a lot of chickens will be significantly faster at the evisceration, I’d say more around 30 seconds.
Also, if you were using a plucker, you could knock back the plucking time to 30-45 seconds per batch of scalded birds.
Cost To Butcher Meat Chickens goes over the costs you can expect to pay if you decide to have your birds processed for you.
9 Steps to process a broiler (with times)
If you have never butchered your own birds before, don’t worry. There are tons of videos on how to do it.
If you are feeling overwhelmed as the butchering date approaches, remember you don’t need to do all of the processing the first day.
When you split the processing it will make it easier for you to handle and it will be less intimidating of a project to get done.
You can do all of your birds in one shot, but don’t feel that you have to.
Taking a bit of extra time, to get the swing of what you are doing and then giving yourself a break before you start the next batch may be the ticket to you enjoying the final step to raising your own broilers.
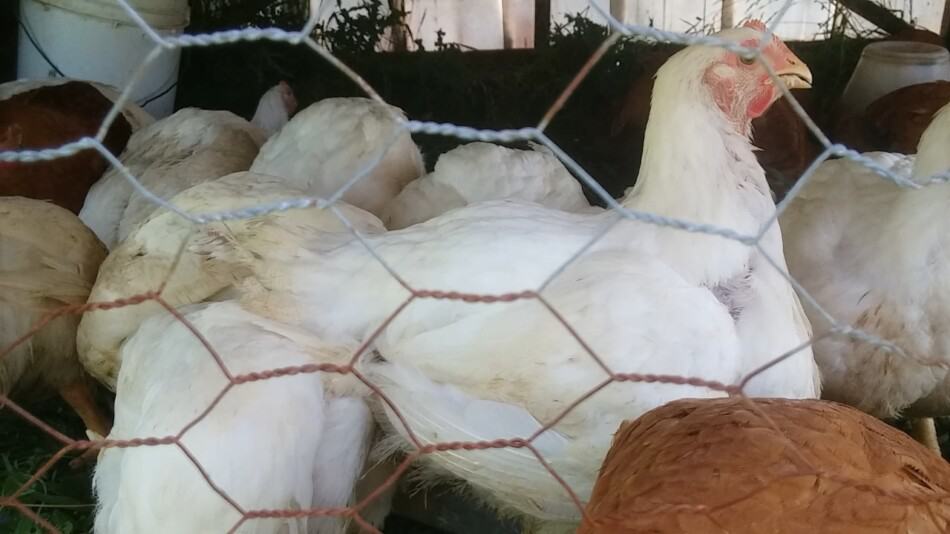
Catch the birds the night before processing
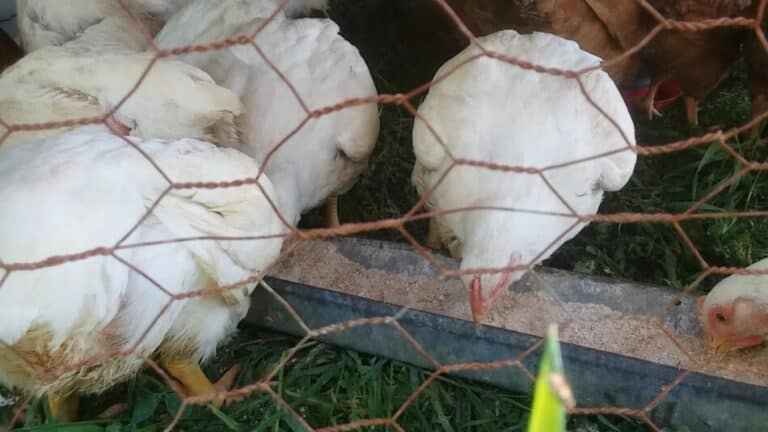
Catch up the birds the night before. Processing will be easier if the birds are emptied out of food.
If you have never caught chickens before, you will have an easier time of it in the dark.
Broilers won’t be hard to catch but stewing hens will be tough to get ahold of if you are not catching them in the dark.
Have all of your butchering supplies out and ready to use
Have all of your butchering items out and ready to use.
This means the knives are sharp and the hose is ready with a spray nozzle end on it so you can clean up as you go.
You’ll want to have a table or two to work off of and a place to put the offal, like the intestines.
You’ll also need a place to put the feathers that come off during plucking, if you are hoping to not have them scattered all over the yard.
Hang your killing cones somewhere secure! You don’t want the cones moving when you are using them.
If more than one person is butchering, you’ll want enough knives for each person to use for evisceration.
For instance, have one knife by the killing cones and one knife per person for the gutting table.
Process one bird at a time!
Do one bird at a time. Just at first until you figure out how things work.
The reason is plucking. If you have a bunch of dead birds stiffening up before you get them plucked, they will be much harder to get the feathers off of.
Do one bird from start to finish until you get the whole process figured out, then you can double up if you want to be a bit faster.
Put the bird in the cone by holding the wings to the body
Be firm and confident with your movements.
Pick the bird up with both hands so that you are holding it’s wings to it’s body and put it head first into the cone.
Using a sharp knife, part the feathers on the neck and slice deep
Bleeding out the bird: 1 minute
Don’t go shallow here, you want the bird to die quickly. You can learn to be more precise as you go, but for the first few, make that initial cut a good one.
Only do one bird at a time until you get more comfortable with what you are doing.
When the bleeding stops, scald the bird
Scalding time: 30 seconds per bird
The key to plucking is the scald. If you get the scald right, plucking is a breeze. If the scald is wrong, plucking will seemingly take forever!
We pluck chickens after dunking them for 30 seconds or so in a 5 gallon bucket of 165 degree water.
While the birds are in the water, you should be swishing them around to get the water to penetrate down through the feathers to the skin.
We’re pretty high tech, so we swish the birds around with a stick.
Keep swishing the bird making sure all of the carcass is getting plenty of water. We usually grab the bird out and flip it over then keep dunking.
When you can pull out the primary feathers (wing feathers) you are close.
Keep dunking until you can swipe your thumb across the thigh and the feathers wipe away. Now you’re there!
Pluck the bird once feathers swipe off
Plucking: 2 minutes by hand, 30-45 seconds with a plucker
Go as fast as you can to get all of the feathers out quickly. Don’t panic here, but definitely keep up the pace!
If you come across any pin feathers (partly formed feathers sticking out of the skin), just pass them over if they are hard to get out.
You can get them later with pliers.
Right now get out everything that is a fully formed feather.
If you are going to be butchering a lot of chickens for the next few years, this is where having a plucker will pay off.
Plucking is much faster with a plucker since you can do multiple birds per run of the plucker. (I’m referring to a barrel type plucker, not the drill type.)
How To Pluck A Chicken Without A Plucker gives you step by step instructions on handplucking birds. We do this all the time, especially if we just have one or two birds to process.
After plucking, it’s time to eviscerate
Evisceration: 2 minutes, efficient time would be 20-30 seconds
Your first few attempts to eviscerate: way longer! (Keep after it, you’ll quickly get better.)
It’s crazy that everyone is worried about the plucking, but I find that evisceration is the part that takes the longest to get the hang of.
It’s not that evisceration is hard, it’s very straightforward what you are trying to do.
I think the catch is that since you are working inside the bird, you can’t see what you are doing, you just feel and guess. You’ll get it, just be patient with yourself.
To be clear, it’s pretty easy to do a messy job of evisceration.
Just yanking out pieces parts will work, but you run a high risk of spilling poo inside the carcass, yikes!
It takes some practice to do a nice efficient job of eviscerating a chicken.
Cut horizontally below the breast bone but above the vent (anus). Now cut a circle around the vent, being careful not to puncture the intestines!
Slide your hand up inside the bird between the guts and the abdominal wall and loosen up anything you feel that is connected to the outside.
Reach clear up to the end of the rib cage to the heart and try to pull everything out at once.
When all of the guts are out reach back in and scrape out the lungs with the tips of your fingers.
Expect the first few livers to be rough looking when you get them out! Once again, you’ll get tons better, but the first few will be awkward.
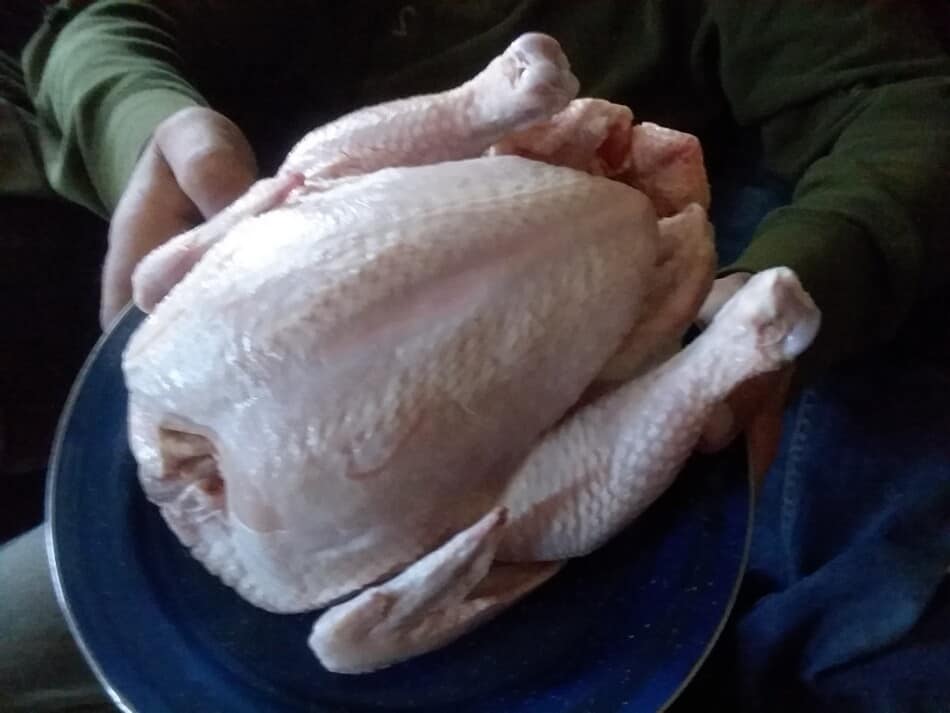
Hose out the carcass and put it in a chill tank
Hose off carcass: 15 seconds
Hose out the finished carcass to get off any lingering blood and plunk the bird in a chill tank to cool before freezing.
Hosing off the bird before you put it in the chill tank keeps the water in the chill tank cleaner.
This is especially important if you messed up and spilled some poo on one of the birds. Ideally, this never happens, but if it does, quickly hose it clean.
Rinse off any blood and hose out the inside of the bird well, dump out that water on the ground then plunk the clean carcass in the chill tank.
The tank does not have to be fancy.
We have used the big plastic storage containers and extra water troughs, whatever has some volume and will hold water is great.
Chilling makes the freezer’s job easier later, plus keeps you working while chilling down your birds.
Running them to the freezer in the middle of your work will slow you down.
Time needed in the chill tank varies on the temperature of the water, which will go up as you add birds.
As long as the water is clean and cool to the touch, we use it.
As soon as the water gets warm or doesn’t look clear anymore, dump the tank and refill.
Bag the chilled birds and put in freezer
Now it’s time to bag. We use the heavy duty plastic bags sold at Meyer Hatchery. There are two sizes, with large being fine for broilers.
These are normal plastic bags that close with a twist tie, they work great.
I know the shrink wrap bags are popular, but we have never used them.
The shrink bags are significantly more money for a bag that just gets thrown away, so I’ll stick with the ones that are cheaper and work great.
Keys to success when butchering a chicken is the scald
The keys to success are be prepared with all of your tools and supplies on hand and pay close attention to the scald.
Once the bird has bled out, everything else will be going well or driving you crazy depending upon the scald being correct.
Yes, the scald is that important!