Learn To Shear Your Own Sheep: Step By Step Our Way
Many flock owners have wool producing sheep, but not many shear their own animals. It does take some practice and some equipment but it is within reach of most any interested person. Even if you are not very strong or agile there are many different approaches to shearing so you can experiment and see which way works best for you.
Anyone who is willing to try can learn to shear sheep. It is a skill that takes time to develop and like all skills the sooner you start practicing the sooner you will be proficient.
Actually, I see shearing sheep as an up and coming opportunity since most men that I know of who will shear your sheep are nearing retirement age. The sheep all still need shorn once the current shearers are no longer practicing the craft.
Shearing sheep is an equal opportunity for all who care to try, the sheep and the clippers will behave the same for everyone no matter your looks or gender. While I don’t know of any gals who shear for a living, I do know many female flock owners who shear for themselves.
Additionally, for those of you who do not want to have the sheep sitting on the ground and have to bend over to shear, there is at least one alternative. I have seen people shear a sheep after putting it up on a fitting stand. A fitting stand is a platform used to elevate a show lamb in order to trim it up for the show ring. We shear with the sheep sitting but that doesn’t mean you have to!
Equipment needed to shear
Most people shearing for themselves and just getting started commercially will be using a sheep clipper with a cord. It is just a really big version of the clippers used by barbers and hairdressers for cutting hair close to the skin.
Electric clippers
The clippers we use are the Longhorn flexible shaft clippers made by Horner. They are made in the U.K. Ours were purchased from Premier in Iowa.
Since you are just starting out go with the clippers with a cord to get used to shearing and get some experience with handling the sheep. We used the Shearmaster for years and have shorn hundreds of sheep with them, they cost around $300.
Once you get some experience and like the work, then upgrade to the shaft style clippers if you decide to start shearing large numbers of sheep or shearing as a professional.
Combs and cutter blades
The clippers have two sets of blades that are used to cut the wool. The comb has long teeth and does not move. It the part of the blades that glides over the skin when shearing. The comb lifts the wool up and holds it in place for the cutter.
The cutter is the smaller of the two blades and has wide triangle shaped teeth that cut the fibers of the wool. The cutter travels back and forth over the comb many times a second. The edge of the cutter blade going past the edge of the comb teeth is what actually cuts the wool, it works just like scissors. The cutter is the only part of the blades that move and that movement is what makes the sound you hear when a sheep is being shorn.
The combs and cutters work as a team, so both need to be new or newly sharpened when you start shearing for the day and both will need to be changed when they start to get dull.
How do you know when the blades are starting to dull out? You can hear the noise the clippers make change, it sounds like a car working harder to go up hill, and the blades will start to leave a corduroy like pattern in the last pass of the clippers. This means you need to stop and change blades.
Generally, you can figure on being able to shear five sheep per set of blades, but this depends upon how clean or dirty the wool is since dirt or manure dulls the blades sooner, and the type of wool being shorn. This you won’t know until you get into each fleece.
Some of our sheep seem to shear really easily, like the Dorset cross ewes. Other ewes that look more shaggy or have tons of lanolin when in full wool seem to be harder to shear unless the weather is perfect, dry and low humidity.
3 in 1 oil
The clipper blades will need periodic oiling as you shear. We just use a 3 in 1 oil that you can get at any hardware store. There are also aerosol oil sprays available. The sprays are fast to apply but don’t last as well as the 3 in 1 oil, since they are made to cool the blades more than lubricate them. The most oiling for your money is with using the 3 in 1 oil, it’s 8 oz. for about $5.00.
Conditions for shearing
Weather conditions for shearing
You can shear in any weather, however if you want it to go well you need specific conditions. Ideal shearing conditions are dry, windy days and warm temperatures of 65 degrees or more.
On warmer days the lanolin in the wool is oily, making it easier to cut through with the blades. On cooler days the lanolin is almost waxy and harder to cut through, think of cutting through soft room temperature butter vs butter you just got out of the fridge.
Wet sheep and humid air make your job harder and dull out your blades faster. Dry sheep will shear smoothly and the blades will last much longer between changes. Wet or really dirty sheep will frustrate you and dull out your blades sooner.
If you have a choice of days to shear, go for dry sheep and less humid air. It won’t matter to the sheep at all, just you and the shearer, so if you have a shearing appointment set up it will still work regardless of weather.
If you don’t have an open schedule then be sure the sheep are penned up where they can’t get any wetter or dirtier overnight. Being inside will help them dry out some, but nothing will fix dirt or manure.
When to shear your sheep
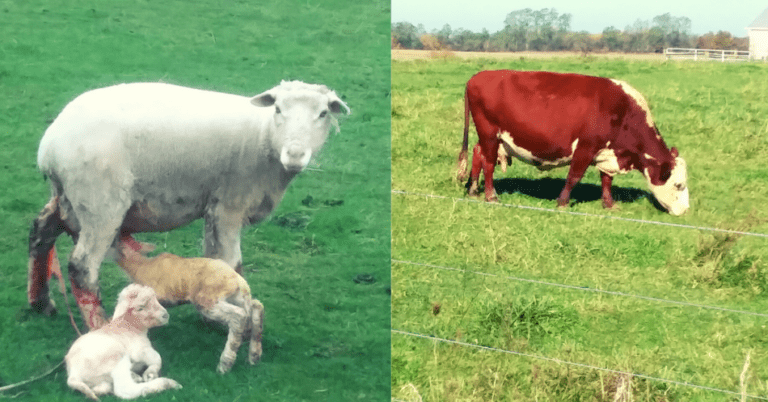
The condition of the sheep themselves for shearing is a factor to consider as well. Ideally, you will be shearing your flock 4-6 weeks before lambing and before they get to graze on the new green grass of spring.
Shearing area
Flat cleanable surface
We use a piece of plywood (4 ft. x 8 ft.) to shear on. Admittedly sometimes this is a bit skinny so upgrading to two pieces joined together making an 8 ft. x 8 ft. square would be better. Nothing wrong with using a wooden or cement floor if that is what you have, but put down a rubber mat for a bit of cushion for the ewe if you are on cement.
Do not have bedding in the shearing area. It gets into the wool and is hard to get out. It is much easier to have a flat surface that you can sweep clean between sheep or as needed.
Wool bag
You will need somewhere to put your wool so you can take it to be sold. Commercial size wool bags hold 80-120 pounds of wool, depending upon how tightly packed it is, or 20-25 fleeces.
The heavier the fleece the less of them will fit into a bag, since the heavier fleeced take up more space. Wool is springy and will expand back up unless it is tightly packed in the wool bag. Once you get 10 or so fleeces in the bag it will look full, it’s not.
Climb up the wool stand and jump on the wool to pack it down. Obviously, you should make sure the stand is secure and you have a way to get out, my husband uses the barn rafters to pull himself up and out. Now there will be room for more fleeces. Leave a bit of room at the top to tie the bag together with twine, natural twine, not plastic.
Wool bags come in plastic and the traditional jute.
Wool bag stand
This is an optional piece of equipment but handy to have! We got ours from Mid States Wool Growers and it was about $250. We went for years without one, but are really glad to have the stand now. If you are a welder (or know one) this is something you could fabricate yourself.
This stand makes it much easier to get the fleeces in the bags and to pack the bags full, rather than struggling to fill a loose bag. Also as far as selling the wool, if you are like us and haul the bags in your truck bed you can fit more wool per bag, making each bag heavier and worth more to sell. Now you get more money for your gas and time travelling to the wool buyer.
Scraps pile
Not all of the wool is clean enough to go into the wool bag. Sometimes there are poopy or muddy spots that need pulled off of the rest of the fleece. We just throw these off to the side of the shearing platform, but if that isn’t your style you will need to have a plan for the scraps as well. Something like a big garbage can would work well here.
Holding pen
The area where you are keeping the sheep that are yet to be shorn is called the holding pen. The sheep need to be squeezed tight in an area close to the shearing area, but does not interfere with the actual shearing. This will make the sheep easy to catch so you will have to put in less effort to move with the sheep into shearing position.
Do yourself a favor and have the barn secure so that even if they get out of the holding pen they can’t leave the barn. You don’t want to have to chase sheep all over the pasture to get them in again because they broke out while you were shearing.
If you do not have a specific shearing set up then just do what you can. Have some extra gates ready to be used and start seeing what works.
We have tried a few different configurations, but what works best for us is to just have the shearing area and the sheep to be shorn all in the same pen. When a sheep is done being shorn we turn her loose, put the wool in the wool bag (which is close by, but outside of the pen) and grab another sheep and start over.
When the group is done we let them all out then go get more. We do a lot of shearing outside in a temporary catch pen so we do not have anything fancy set up for working the sheep. We just run an extension cord out to the pen from the garage and get started.
Why does all of this preparation matter?
You will make things much easier on yourself if you have your area and equipment ready and in the most functional set up. Sometimes in the spring there are only a few dry days. This means a lot of shearing has to be done in a small amount of time.
Maximizing your shearing for these few days will get the most results for your time.
The stress on the sheep is to be considered as well. If you only have to catch them once and get all of the shearing done that day, the flock can go back to eating and working on making you money.
How to shear a sheep
This is where the fun starts! You should have all your equipment ready and the sheep in a pen that is small enough you aren’t running all over trying to catch one, better for them and you.
The easiest sheep to shear will be mature ewes with clean, open fleeces, do these first. Why? You will get more done while you are fresh and get more sheep shorn per set of blades since the dirty/greasy ones dull blades faster.
Another idea to keep in mind is to shear all of the yearlings as one group. You will get used to the size of the sheep’s body and the adjustments you need to make while shearing a sheep of that size. Switching back and forth with different sizes will slow down your pace while you mentally readjust.
We put the sheep down on her butt (like she is sitting in a chair) so that is the method we will be describing here.
Your first few attempts will be awkward. There is no getting around it. But that is the same for everyone learning a new skill, so if they can do it with some practice so can you.
Here are some general guidelines regarding shearing:
- Keep the blades gliding along the skin, this will get all of the wool off in the first pass of the clippers and eliminate second cuts (short unusable bits of wool)
- Make the pass with the clippers in one long smooth stroke, ideal shearing uses fewer strokes to get the whole sheep shorn, less stress on sheep and faster for you
- Have the sheep extend out the area you are shearing like bending the body away from the clippers and extending out the leg, this minimizes skin folds
- Take your time, learning requires some fumbling and adjusting at first
Step 1. Right front leg to right rear leg
Pull the right leg up to extend the leg and expose a bare spot to get your clippers started. Your first pass will be on the border of the belly and side to the left of the rear flank. Be careful here! It’s easy to cut the sheep here!
This pass will expose the flank so you know where to direct the next swipe.
Step 2. Shear up her side until you are over the backbone
This is an easy one! All of the strokes are long and just on the edge of the stroke before. Keep the passes with the clipper going the full length of the sheep.
Step 3. Belly
Start at the brisket. Make one or two cuts down and to the left extending over into the far side. Next make one or two passes down and to the right. You will have just made a “V” shape so you can see what you are doing.
Go across from the right to the left, slowing down as you get closer to the udder. If you are shearing a ram, be careful to avoid cutting the end of the sheath.
Have the sheep setting square with both hind legs straight. Do areas that still have wool, like behind the udder and the insides of the hind legs.
Step 4. Left back leg to left front leg
Make the swipe as long as you can. Sometimes you will be able to go the whole length of the sheep sometimes not.
Continue shearing up the side until you reach the backbone. You should be making the last pass to meet the shearing over the backbone you did from the other side.
Since the sheep is narrower at the front than the back, over her hips will need more passes to get all the wool.
Step 5. Shear the head, neck and shoulders
Start at the top, shearing the tuft of wool on the forehead first.
Next do the cheeks and on to the wool below the ears.
Starting at the head, shear down the right shoulder and out the right leg. This will split the wool that is around the neck. Keep working your way clockwise around the neck and shoulders, meeting the passes you have shorn before.
Once you finish the right shoulder, go back to the brisket. Try to extend the neck to keep the wool tight. Make the strokes towards the head, working counter clockwise. When you get to the leg your strokes will actually be going more in a right to left direction.
Now make a few strokes down to the left with the front leg extended. Extending the leg keeps the skin flat and makes your strokes run across the armpit folds at an angle so you don’t cut the skin.
Step 6. Clean up any areas that you missed
Depending upon the size of the sheep and your range of motion, you may have areas of wool you missed. Now is the time to finish up any hard to reach areas.
You are done! Pull off any poopy spots on the fleece and put it in the wool bag. Get ready for your next sheep and start again!